Understand your battery bank, use its energy wisely, and care for the system that powers life in your RV.
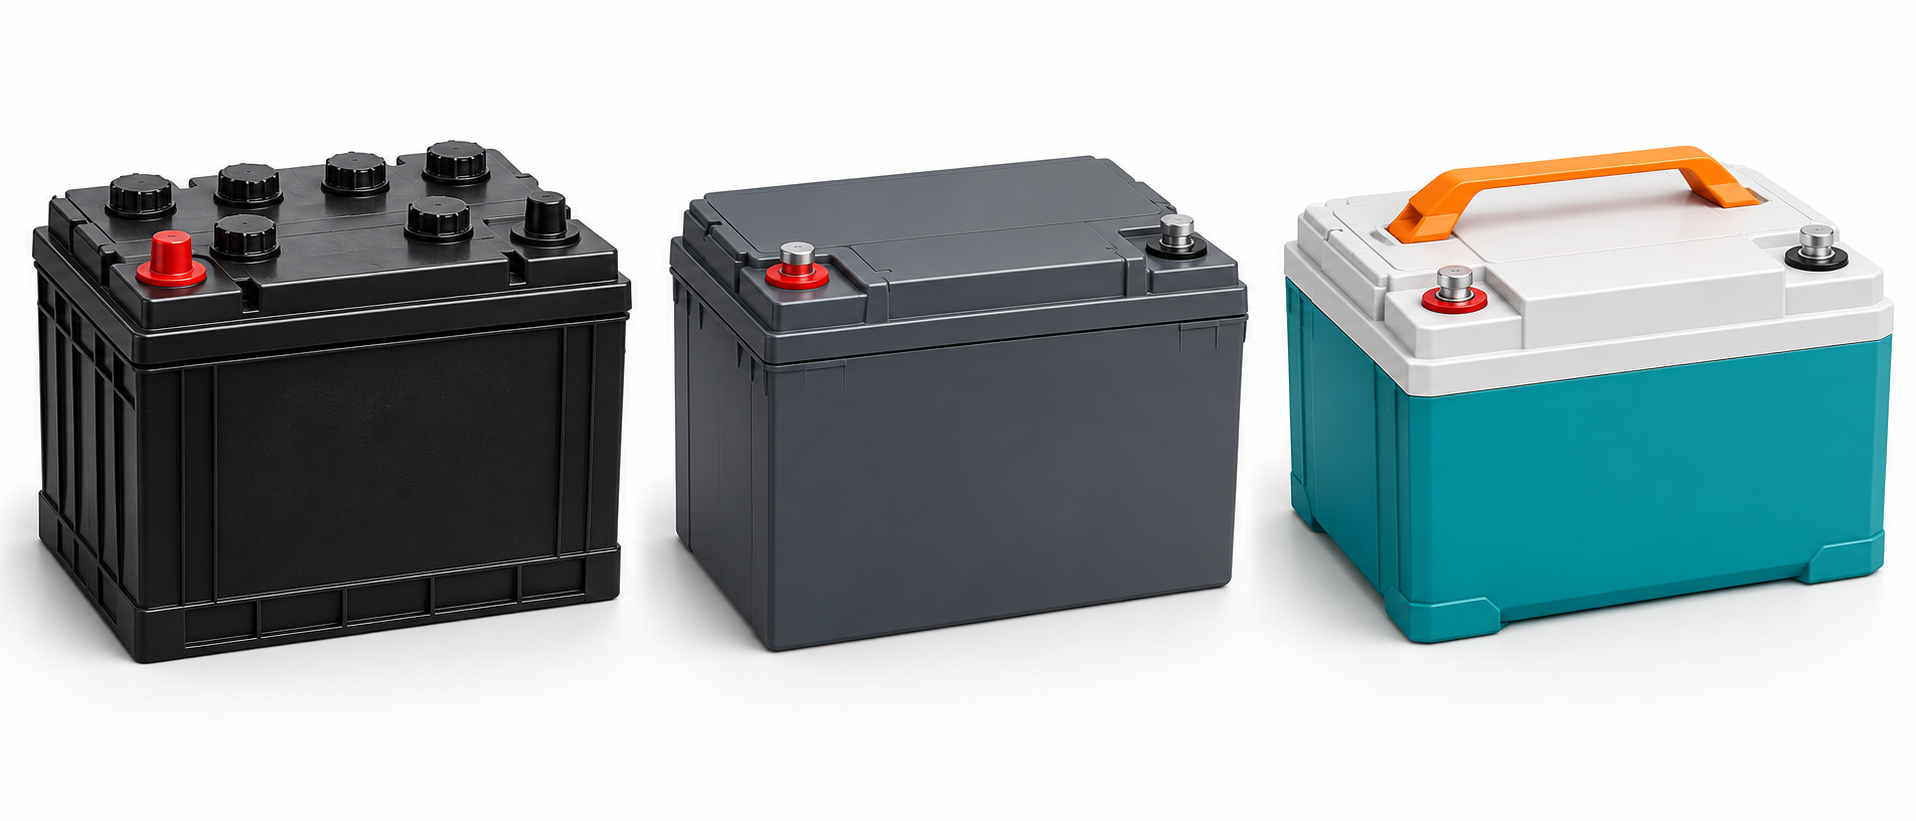
Left to right: flooded lead-acid, sealed AGM and LiFePO4 lithium. Illustrative housings; use the label and manual to identify your actual battery.
01 · BATTERY TYPES
Know what is under the cover.
Start with chemistry, not the color of the case. Battery labels and manuals tell you how a bank should be charged, maintained and protected.
01
Flooded lead-acid
Liquid electrolyte; often lower initial cost but heavy. Serviceable models need distilled water and regular inspection. Plan everyday use around roughly 50% depth of discharge unless the maker specifies otherwise.
Install upright, secured and in an approved compartment vented outside the living area. Keep ignition sources away from charging gas.
02
AGM / sealed lead-acid
Electrolyte is held in glass mats. No routine watering; never open sealed cells. Use the specified charging profile and mounting orientation. Gel batteries are another sealed lead-acid type with their own settings.
AGM can vent under fault or overcharge. Follow battery and RV ventilation requirements; an airtight box is not appropriate.
03
LiFePO4 lithium
Usually lighter, with a flatter voltage curve and more usable capacity. Verify BMS current limits, approved charge settings, temperature restrictions and series/parallel permissions.
No normal charging-gas vent is needed, but indoor mounting must be approved. Secure and protect the battery, terminals and wiring. A BMS does not replace circuit protection.
01
Flooded: liquid inside
The electrolyte is free liquid. Water service, upright placement and the approved vented enclosure matter. A marine starting or dual-purpose battery is not automatically equivalent to a purpose-built house deep-cycle battery.
02
AGM: absorbed electrolyte
AGM holds electrolyte in a glass mat. It is still lead-acid; sealed construction means no routine watering, not permission to ignore charging or ventilation.
03
Lithium: LiFePO4 + BMS
The battery management system monitors cells and can interrupt charge or discharge. Some packs include a BMS; other designs require an external system. Verify what your model includes.
Understand the difference between the house bank, the engine-starting battery and the equipment that charges or uses them.
House batteries store energy for lights, fans, controls, pumps, many slides and jacks, and the blower in a propane furnace. Propane supplies heat, but many appliances still require DC power to operate. Check each appliance label.
01
House / coach battery
Designed for repeated discharge and recharge while supporting living-area loads. Choose for usable energy, sustained current and the installed charging system.
02
Starter / chassis battery
Provides the high-current burst needed to start an engine. Many motorhomes have a separate chassis battery and charging arrangement. A house disconnect may not isolate that system.
Follow the energy through your RV
01
01 · Charge
Shore power, a generator, solar or the alternator sends energy through the appropriate charging equipment.
02
02 · Store
The house bank stores DC energy. Its voltage and capacity must match the system design.
03
03 · Distribute
Protected DC circuits feed lights, pumps and controls. An inverter supplies supported AC loads.
Why do propane appliances still need a battery?
Many furnaces, refrigerators and water heaters use DC electricity for controls, ignition or fans even when propane supplies heat. A full propane tank does not replace control power. Verify your appliance requirements.
Starting batteries and house batteries do different jobs
Starting / chassis battery: supplies the short, high-current burst to crank the engine and supports chassis electronics. Shop using the chassis maker’s voltage, battery type, group size, terminal layout, CCA and reserve-capacity requirements.
House / coach battery: supplies living-area loads over hours and is selected for repeated cycling, usable Wh/Ah and continuous/surge current. Starting batteries are not intended for repeated deep discharge. A marine “dual-purpose” label does not automatically make a battery the best choice for either job.
Class C · follow the van or truck chassis
A Class C has a chassis starting battery or bank and a separate house bank. Many gasoline chassis use one 12V starting battery; diesel and other chassis can differ. Check the chassis manual rather than assuming battery count, location or CCA from the Class C label.
Class A gas · starting requirements still come from the chassis
Many gas Class A motorhomes use a 12V starting battery. It cranks the engine; the house bank handles camping loads. A larger motorhome body does not by itself determine battery chemistry, size or required CCA.
Class A diesel · often a larger starting bank
Many diesel pushers use two 12V starting batteries in parallel for higher cranking capability while keeping a 12V bank. Two batteries do not automatically mean 24V. Some chassis have different arrangements; verify the chassis wiring, specified battery set and system voltage. Replace a multi-battery starting bank as its maker directs.
One coach, two electrical jobs
The alternator may charge both banks through an isolator, relay or DC–DC system. Shore power usually charges the house bank through a charger, but it does not always maintain the chassis bank. Verify your rig’s design. A house disconnect may leave chassis circuits and some always-on house loads connected.
Boost switches and lithium upgrades
An AUX START / BOOST switch may temporarily connect the banks on equipped coaches. Use only the manufacturer’s procedure. A house lithium battery is not automatically rated for engine cranking, and its BMS may shut off under starting current. Verify boost-relay and charging-system compatibility when changing chemistry; do not replace a chassis battery with a house-only lithium model.
Find the coach manual and the separate chassis manual for your year/model. Record chassis battery group size, CCA, chemistry, count and bank voltage alongside the house-bank details.
03 · BANK CONNECTIONS
Series changes volts. Parallel changes Ah.
The wiring arrangement changes what the bank can supply. Always compare watt-hours when nominal voltages differ.
EXPLORE THE CONNECTIONS
Same two batteries. Two ways to connect.
Start with two matching 12V, 100Ah batteries. Tap a mode to see its wiring and results, then tap the questions to explore the connections. Opening one mode closes the other in browsers that support grouped disclosure controls.
Select PARALLEL · keep 12V
12V · 200Ah · 2,400Wh
+12V 100Ah−
+12V 100Ah−
BANK +BANK −
Connect + to + and − to −. Voltage stays 12V; the two 100Ah capacities add to 200Ah.
Tap: which terminals are connected?
Connect + to + and − to −. Voltage stays 12V; the two 100Ah capacities add to 200Ah.
Tap: where does the RV connect?
Take bank positive from the first battery’s + and bank negative from the opposite-end battery’s −. This diagonal takeoff helps share current in a simple two-battery parallel bank.
Tap: why is the energy still 2,400Wh?
12V × 200Ah = 2,400Wh. Each original battery stores 12V × 100Ah = 1,200Wh nominal. Combining the same two batteries changes the bank voltage and Ah relationship; it does not create extra energy. Actual usable energy depends on chemistry, reserve and operating conditions.
Select SERIES · make 24V
24V · 100Ah · 2,400Wh
+12V 100Ah−
+12V 100Ah−
BANK +BANK −
Connect one battery’s − to the other battery’s + using the teal jumper. Voltage adds to 24V; capacity stays 100Ah.
Tap: which terminals are connected?
Connect one battery’s − to the other battery’s + using the teal jumper. Voltage adds to 24V; capacity stays 100Ah.
Tap: where does the RV connect?
The free + terminal is bank positive. The free − terminal is bank negative. They provide 24V across the complete pair, not 12V. Use compatible 24V equipment; supply 12V RV loads through a correctly specified DC–DC arrangement.
Tap: why is the energy still 2,400Wh?
24V × 100Ah = 2,400Wh. Each original battery stores 12V × 100Ah = 1,200Wh nominal. Combining the same two batteries changes the bank voltage and Ah relationship; it does not create extra energy. Actual usable energy depends on chemistry, reserve and operating conditions.
The connection changes voltage and amp-hour capacity. The two examples below contain the same nominal energy: 2 × 12V × 100Ah = 2,400Wh.
Parallel · same voltage, more amp-hours
Connect positive to positive and negative to negative: 12V / 100Ah + 12V / 100Ah makes 12V / 200Ah. The opposite-end output takeoffs shown can help balance a simple two-battery bank. Never parallel different voltages.
Series · higher voltage, same amp-hours
Connect one negative to the other positive, then use the free terminals: two 12V / 100Ah batteries make 24V / 100Ah. Two 6V / 100Ah batteries in series make 12V / 100Ah.
01
Two 6V batteries in series
6V × 225Ah + 6V × 225Ah → 12V × 225Ah = 2,700Wh nominal. Voltage adds; Ah stays the same.
02
Two 12V batteries in parallel
12V × 100Ah + 12V × 100Ah → 12V × 200Ah = 2,400Wh nominal. Ah adds; voltage stays the same.
03
Two 12V batteries in series
12V × 100Ah + 12V × 100Ah → 24V × 100Ah = 2,400Wh nominal. Higher voltage does not create more energy.
Read the + and − symbols, not just the wire color. Orange represents bank positive, dark gray represents bank negative, and teal marks a series jumper. These are connection concepts; actual cable lengths, fuses, disconnects and BMS requirements must be designed for the installation.
1 · Two 12V batteries in parallel
+12V 100Ah−
+12V 100Ah−
BANK +BANK −
12V / 200Ah = 2,400Wh nominal. Join + to + and − to −. Bank positive comes from the first battery and bank negative from the opposite end. Voltage stays 12V; capacity adds.
2 · Two 6V batteries in series
+6V 225Ah−
+6V 225Ah−
BANK +BANK −
12V / 225Ah = 2,700Wh nominal. Join the first battery’s − to the second battery’s +. Use the remaining + and − as the bank outputs. Voltage adds; Ah stays 225.
3 · Two 12V batteries in series
+12V 100Ah−
+12V 100Ah−
BANK +BANK −
24V / 100Ah = 2,400Wh nominal. The same series connection doubles voltage. It does not double Ah. A 24V bank cannot directly power 12V RV equipment; use a correctly specified DC–DC converter. Do not tap one battery for 12V loads.
4 · Four 6V batteries: series + parallel
+6V 225Ah−
+6V 225Ah−
+6V 225Ah−
+6V 225Ah−
BANK +BANK −
12V / 450Ah = 5,400Wh nominal. Each row is a 12V, 225Ah series string. Join the two free positives together and the two free negatives together to parallel the strings. Use balanced current paths; the drawing is not to cable-length scale.
Connection checks
Use compatible matching batteries, the maker’s permitted series/parallel arrangement, and the specified state of charge before linking. Verify bank voltage and polarity before connecting equipment. The drawings omit required protection: properly located fuses, disconnects, terminal covers, cable ratings and any string protection. Use insulated tools and isolate charging sources before work.
System voltage describes the DC battery bank. It is separate from battery chemistry, capacity and the 120V AC power used by many appliances.
12V · simple and familiar
Benefits: works directly with most conventional RV lights, pumps, appliance controls and other 12V equipment. Wide component availability often makes a smaller retrofit simpler.
Tradeoff: large inverters draw high battery current, which can require heavy cables, substantial busbars and high-current protection.
Often suits: basic camping loads, modest inverter use, and upgrades that retain the existing 12V architecture.
24V · a middle ground
Benefits: about half the battery current of 12V at the same power and efficiency. Lower current can reduce cable heating and voltage drop, or allow smaller conductors when the complete design permits.
Tradeoff: needs a 24V inverter and compatible charging equipment. Standard 12V RV loads need an appropriately sized 24-to-12V DC–DC supply or a separately maintained 12V bank.
Often suits: larger inverter loads where reduced current is useful without moving to 48V.
48V · useful for larger power systems
Benefits: about one-quarter the battery current of 12V at the same power and efficiency. Often useful for substantial inverter power and larger energy-storage systems.
Tradeoff: requires 48V-compatible components and conversion for 12V RV loads. Equipment and DC protection must be rated for the bank’s actual maximum voltage, not just its “48V” label.
Often suits: a planned larger system where reduced current justifies the equipment changes and added conversion.
Same 3,000W AC load. Different battery current.
Assume 90% inverter efficiency and exactly 12V, 24V or 48V at the battery. DC amps ≈ AC watts ÷ efficiency ÷ battery volts. All bars share the same scale.
12V bank · about 278A DC
24V bank · about 139A DC
48V bank · about 69A DC
Each inverter still supplies 3,000W to the appliance. Higher voltage does not make the appliance use less energy. Actual battery voltage, inverter efficiency, idle draw and startup surges change the current. These are not cable- or fuse-sizing recommendations.
Equal energy: compare Wh, not Ah alone
Nominal bank
12V
Capacity
400Ah
Stored energy
4,800Wh / 4.8kWh
Nominal bank
24V
Capacity
200Ah
Stored energy
4,800Wh / 4.8kWh
Nominal bank
48V
Capacity
100Ah
Stored energy
4,800Wh / 4.8kWh
These simplified nominal-voltage examples store equal energy. They have similar theoretical runtime at the same usable fraction and load, before differing losses. Common LiFePO4 equivalents are 12.8V, 25.6V and 51.2V; use the actual label voltage when calculating Wh.
Keep the RV’s 12V equipment on 12V
24V / 48V HOUSE BANK
Feeds compatible inverter and charging equipment.
↓ DC–DC converter / approved charging arrangement
Matches the higher bank voltage to the 12V side.
12V distribution → lights, pump and appliance controls
Size for simultaneous loads and motor starting. Slides, jacks and other high-current loads may need a different supply arrangement or a dedicated 12V battery.
Never connect a 12V appliance directly to a 24V or 48V bank. Do not take 12V from one battery or a midpoint in a higher-voltage string: it unbalances the bank. An RV’s chassis starting system may stay 12V while its separate house bank uses a higher voltage.
What changes when system voltage changes?
Battery bank: use a purpose-built bank or a manufacturer-approved series arrangement. Not all lithium BMS units permit series connections.
Inverter/charger: its DC voltage must match the bank. Shore-power amperage and AC output voltage are separate specifications; a 48V battery bank can feed a compatible 120V AC inverter.
Solar: the controller must support the new bank voltage, adequate panel voltage and the correct charge profile. A controller with the same output-amp rating can often handle more charging watts at higher bank voltage, but its model-specific PV and power limits still apply.
Alternator and other charging sources: verify voltage conversion and alternator protection. A 12V chassis alternator cannot simply be connected directly to a higher-voltage house bank.
DC–DC supply: check continuous current, surge current, cooling and essential loads. Include converter losses and any standby draw.
Cables and protection: size using current, distance, installation conditions and voltage drop. Fuses, breakers and disconnects need suitable DC voltage and interrupt ratings at the maximum charge voltage. Existing 12V-rated components may be unsuitable.
Choosing: begin with your daily Wh, largest simultaneous load, peak current, available installation space and complete installed cost. Higher voltage can ease high-power wiring, but it does not automatically create more stored energy, lower purchase cost or longer runtime.
Start with the energy your appliances need over time, then allow for reserve, real operating conditions and conversion losses.
Term
A · amps
Meaning
Current flowing now.
Example
A pump drawing 5A.
Term
Ah · amp-hours
Meaning
Capacity at a stated voltage and test condition.
Example
100Ah × 12V ≈ 1,200Wh nominal.
Term
W · watts
Meaning
Power being used.
Example
40W fan while running.
Term
Wh · watt-hours
Meaning
Energy over time.
Example
40W × 5h = 200Wh.
Size the bank: daily Wh × days of reserve ÷ usable fraction = nominal Wh needed. For example, 1,200Wh/day × 1 day ÷ 0.8 = 1,500Wh nominal, before extra weather/emergency reserve. At 12V that is 125Ah; at 24V it is 62.5Ah. Use the actual battery’s nominal voltage for final calculations.
Check current too: a 2,000W AC load through a 90%-efficient inverter at 12V needs about 185A DC before surge. The battery/BMS, inverter, cables, connections and protection all must support it. Capacity alone is not enough.
A rough runtime estimate is usable battery Wh ÷ load W. Real runtime changes with inverter loss, idle draw, temperature, aging and load behavior. Lead-acid capacity also falls under high discharge rates.
100Ah does not mean the same usable energy
12V flooded · 100Ah · 50% planned use · 600Wh
12V AGM · 100Ah · 50% planned use · 600Wh
12.8V LiFePO4 · 100Ah · 80% planned use · 1,024Wh
Simplified nominal-voltage estimates. Grey remainder includes the planned unused reserve. Discharge-rate effects, temperature and aging are not included.
1
Add your loads
A 40W fan for 5 hours uses 200Wh. A 60W DC load for 4 hours uses 240Wh. That is 440Wh before other loads or reserve.
2
Account for AC conversion
A 600W AC appliance used for 30 minutes needs 300Wh at its outlet. At an assumed 90% inverter efficiency, it uses about 333Wh from the battery, plus any extra idle draw.
3
Check energy and current
For a 12.8V 100Ah lithium example, 80% planned use is 1,024Wh. A steady 100W DC load gives roughly 10.2 hours by simple division. A 2,000W load also needs sufficient BMS current, cables and inverter capacity.
All bars use the same 1,280Wh scale. These are planning examples, not measured runtimes or universal discharge limits.
Flooded lead-acid · 12V, 100Ah
600Wh planned usable = 12 × 100 × 50%
AGM · 12V, 100Ah
600Wh planned usable = 12 × 100 × 50%
LiFePO4 · 12.8V, 100Ah
1,024Wh planned usable = 12.8 × 100 × 80%
At a steady 100W DC load: about 6 hours versus 10.2 hours before real-world losses. Actual capacity, discharge rate, temperature and age change runtime. AC loads also incur inverter losses.
05 · EFFICIENCY COMPARISON
Keep more of the energy you charge.
Usable capacity and round-trip efficiency describe different things. Lithium’s advantage is most useful when you cycle and recharge often.
1,000Wh in: how much comes back?
Illustrative lead-acid · 80% round-trip · 800Wh
Illustrative LiFePO4 · 92% round-trip · 920Wh
Reference values from Victron’s chemistry comparison—not guaranteed ratings for every product. System conversion losses are additional.
Lithium, AGM & flooded lead-acid: what does “efficient” mean?
AGM is a type of lead-acid battery. Here, “flooded” means a wet-cell lead-acid battery; “lithium” means LiFePO4 house batteries. Compare three things separately: how much stored energy you plan to use, how much energy is lost charging and discharging, and how the bank handles your actual loads.
What matters
Everyday usable capacity
Flooded lead-acid
Use 50% in this planning example.
AGM lead-acid
Use 50% in this planning example.
LiFePO4 lithium
Use 80% in this planning example, leaving a reserve.
What matters
Recharge behavior
Flooded lead-acid
Current tapers during absorption; reaching full charge takes time.
AGM lead-acid
Also tapers near full; charge acceptance depends on model.
LiFePO4 lithium
Generally accepts charge more readily; BMS, charger and temperature still set limits.
What matters
Under heavy inverter loads
Flooded lead-acid
Voltage sag and the Peukert effect can reduce available energy.
AGM lead-acid
Still affected by discharge rate; often handles high currents better than flooded, depending on design.
LiFePO4 lithium
Flatter voltage and less rate-related capacity loss; a BMS can shut the bank off if limits are exceeded.
What matters
Care and storage
Flooded lead-acid
Water serviceable cells, keep charged and provide required ventilation.
AGM lead-acid
No watering. Avoid prolonged undercharging and follow ventilation requirements.
LiFePO4 lithium
No watering. Follow storage state-of-charge guidance and cold-charge limits.
What matters
Who benefits?
Flooded lead-acid
Low purchase cost for light or occasional use when weight and maintenance are acceptable.
AGM lead-acid
Owners wanting no watering with a compatible existing lead-acid system.
LiFePO4 lithium
Frequent cycling, solar and boondocking where weight, usable energy and recharge time matter.
Depth of discharge is a planning choice, not an efficiency rating. The 50% lead-acid guideline helps preserve cycle life; it does not mean the remaining energy vanishes or that deeper discharge is impossible. Some AGM designs support deeper cycling. Lithium models may allow 100% rated discharge, but reserve and shallower cycling can be useful. Follow the exact manufacturer’s cycle-life curves and limits.
Energy in versus energy back out
Victron gives an illustrative full-cycle round-trip energy efficiency of 80% for average lead-acid and 92% for its LFP comparison. These are reference examples, not guaranteed ratings for every battery in the price table. AGM and flooded models differ; no single percentage describes all AGM batteries.
Example at battery terminals
Lead-acid at 80% round-trip efficiency
Energy put in
1,000Wh
Energy returned
800Wh
Energy lost
200Wh
Example at battery terminals
LiFePO4 at 92% round-trip efficiency
Energy put in
1,000Wh
Energy returned
920Wh
Energy lost
80Wh
To return 1,000Wh in that example requires about 1,250Wh into lead-acid versus 1,087Wh into lithium—about 13% less charging energy. Charger, solar-controller, inverter and wiring losses are additional. Do not multiply usable capacity by round-trip efficiency again when estimating discharge runtime; round-trip efficiency accounts for the complete charging-and-discharging cycle.
01
More usable energy
At the selected planning depths, one 100Ah lithium battery supplies more usable energy than one 100Ah lead-acid battery. It is not “creating” extra Ah.
02
Less recharge energy lost
Higher round-trip efficiency means more of the energy delivered to the battery returns to your loads. Solar and generator users can benefit from that difference.
03
Faster is system-dependent
High charge acceptance helps only when the charger, wiring, source and temperature allow it. A larger lithium bank on a small charger can still take a long time to refill.
Use a common usable-energy target, then add the costs required to make the entire charging and electrical system compatible.
Price breakdown: compare usable energy
U.S. listing snapshot reviewed October 25, 2026. Prices below use the displayed single-battery price before extra cart discounts, tax, shipping or core fees. Prices and availability change. Renogy’s AGM listing was unavailable when checked. These are examples, not a complete market survey or a product recommendation.
Example battery
Flooded: EverStart 27DC, 12V 109Ah
Unit price
$103.00
Nominal energy
1,308Wh
Planned usable energy
654Wh at 50%
Example battery
AGM: Renogy 12V 100Ah
Unit price
$208.99
Nominal energy
1,200Wh
Planned usable energy
600Wh at 50%
Example battery
Lithium: LiTime 12.8V 100Ah
Unit price
$335.99
Nominal energy
1,280Wh
Planned usable energy
1,024Wh at 80%
Example battery
Premium lithium: Battle Born 100Ah, 12V class
Unit price
$799.00
Nominal energy
1,280Wh using 12.8V for this example
Planned usable energy
1,024Wh at 80%
Formula: nominal volts × Ah × planned usable fraction = usable Wh. Values are simplified nominal-energy estimates, not measured runtime. Lead-acid Ah ratings depend on the stated discharge test rate; cold, aging and heavy loads reduce usable energy.
Bank providing at least 1,000 usable Wh
Flooded EverStart
Quantity
2 in parallel
Battery-only total
$206.00
Planned usable energy
1.308kWh
Cost per usable kWh
$157.49
Bank providing at least 1,000 usable Wh
Renogy AGM
Quantity
2 in parallel
Battery-only total
$417.98
Planned usable energy
1.200kWh
Cost per usable kWh
$348.32
Bank providing at least 1,000 usable Wh
LiTime lithium
Quantity
1
Battery-only total
$335.99
Planned usable energy
1.024kWh
Cost per usable kWh
$328.12
Bank providing at least 1,000 usable Wh
Battle Born lithium
Quantity
1
Battery-only total
$799.00
Planned usable energy
1.024kWh
Cost per usable kWh
$780.27
Each bank meets the same minimum energy target, but the totals are not identical capacities; the cost-per-usable-kWh column accounts for that difference. At these snapshot prices, the LiTime example costs $129.99 more than the flooded bank and $81.99 less than the AGM bank, before installation changes. Premium lithium has a substantially different purchase price. Brand, warranty, support, heating, BMS features and certifications also matter.
The full upgrade bill & long-term value
Battery price is only the starting point. Itemize any required lithium-compatible converter/charger, solar-controller changes, alternator/DC–DC charging equipment, current-rated cables and fuses, mounting, monitoring, temperature protection and labor. Some existing equipment is already compatible; get a system-specific quote rather than assuming every item needs replacement.
Total ownership cost = initial batteries + required upgrades + replacement batteries + charging energy/fuel + maintenance. Lithium often provides more cycles, but the saving depends on the exact products, depth of discharge, temperature and how often you camp. Cycle claims are laboratory ratings under specified conditions, not calendar-life promises. An occasional camper may age a battery out before using its available cycles.
For a transparent replacement scenario, buying the example flooded bank twice totals $412 and buying it four times totals $824; the AGM bank totals $835.96 and $1,671.92 respectively. These are arithmetic scenarios only—they do not predict that lead-acid will need two or four replacements during one lithium bank’s life. Use verified cycle curves and your own annual usage before estimating a payback date.
Try it on your RV
List your daily energy use in Wh and the reserve you want.
Compare banks at the same usable-energy target, then verify continuous and surge-current capability.
Add the complete installed cost and check warranty, cold-charge protection and local service before choosing.
A 1kWh energy target says nothing about whether the bank can run a 2,000W inverter. Check BMS current limits, wiring and protection separately.
Illustrative prices only — not current quotes. Compare one 100Ah battery from each category. Include any required system changes separately.
Flooded example: $150 ÷ 0.60kWh
$250 per planned usable kWh
AGM example: $200 ÷ 0.60kWh
$333 per planned usable kWh
LiFePO4 example: $300 ÷ 1.024kWh
$293 per planned usable kWh
Bars share a $333.33/kWh scale. This compares initial battery cost only. It does not predict the best choice or the complete installed cost.
Long-term value: count delivered energy
Lifetime cost per kWh ≈ total ownership cost ÷ lifetime energy delivered.
Example A $300 total cost 0.60kWh × 400 cycles $1.25/kWh
Example B $600 total cost 1.024kWh × 2,000 cycles $0.29/kWh
Hypothetical arithmetic, not product ratings. This simplified example assumes constant delivered capacity and excludes charging losses and energy costs. Real batteries lose capacity; use the exact product’s cycle curves, calendar life, usage and complete installed cost. A battery you use infrequently may age out before reaching its cycle rating.
07 · CHARGING & MONITORING
Give each chemistry the right charge.
The battery label, charger profile and temperature limits need to agree across every charging source.
Source
Shore power / generator
Required interface
Compatible converter/charger or inverter/charger.
Source
Solar panels
Required interface
Battery-compatible solar charge controller.
Source
Alternator
Required interface
Approved isolator / charging system; DC-to-DC charger where required.
Source
External charger
Required interface
Correct voltage, chemistry and current settings.
Use the exact battery’s charge voltage, current and temperature settings. Do not apply a lead-acid equalization/desulfation program to lithium or AGM unless explicitly approved.
Recharge time depends on energy removed, available current and charging stages. Lead-acid absorption slows near full; there is no universal three-hour or four-hour rule.
A shunt monitor tracks current and accumulated energy when correctly installed and synchronized. Lithium voltage alone is a poor state-of-charge gauge.
Resting voltage can help assess lead-acid charge using its maker’s chart. Active loads and charging distort the reading.
A lithium upgrade may require charger, alternator protection, solar settings, wiring and fuse changes. “Drop-in” dimensions do not prove whole-system compatibility.
1
Bulk: replace the energy
A charger delivers available current up to the model’s limits until the configured charge voltage is reached. Actual current is limited by the source, charger, wiring, bank and loads.
2
Absorption: finish the charge
Current tapers as the charge is completed. Lead-acid needs adequate completion time; repeated undercharging can shorten its life. Lithium finishing and balancing requirements depend on the battery design.
3
Float or storage: follow the manual
Lead-acid maintenance charging and lithium storage guidance differ. Do not copy another brand’s voltage, equalization or low-temperature settings.
01
Solar
The controller must match panel input limits, bank voltage and battery chemistry. Battery temperature can differ from the air temperature.
02
Alternator
Lithium can accept substantial current. Verify approved alternator protection and any required DC–DC charger rather than assuming a direct replacement is sufficient.
03
Battery monitor
A correctly installed shunt measures current into and out of the bank. Loads or chargers bypassing the shunt make state-of-charge calculations inaccurate.
Inspect before problems interrupt a trip. Separate owner checks from work that requires safe isolation, tools and electrical service.
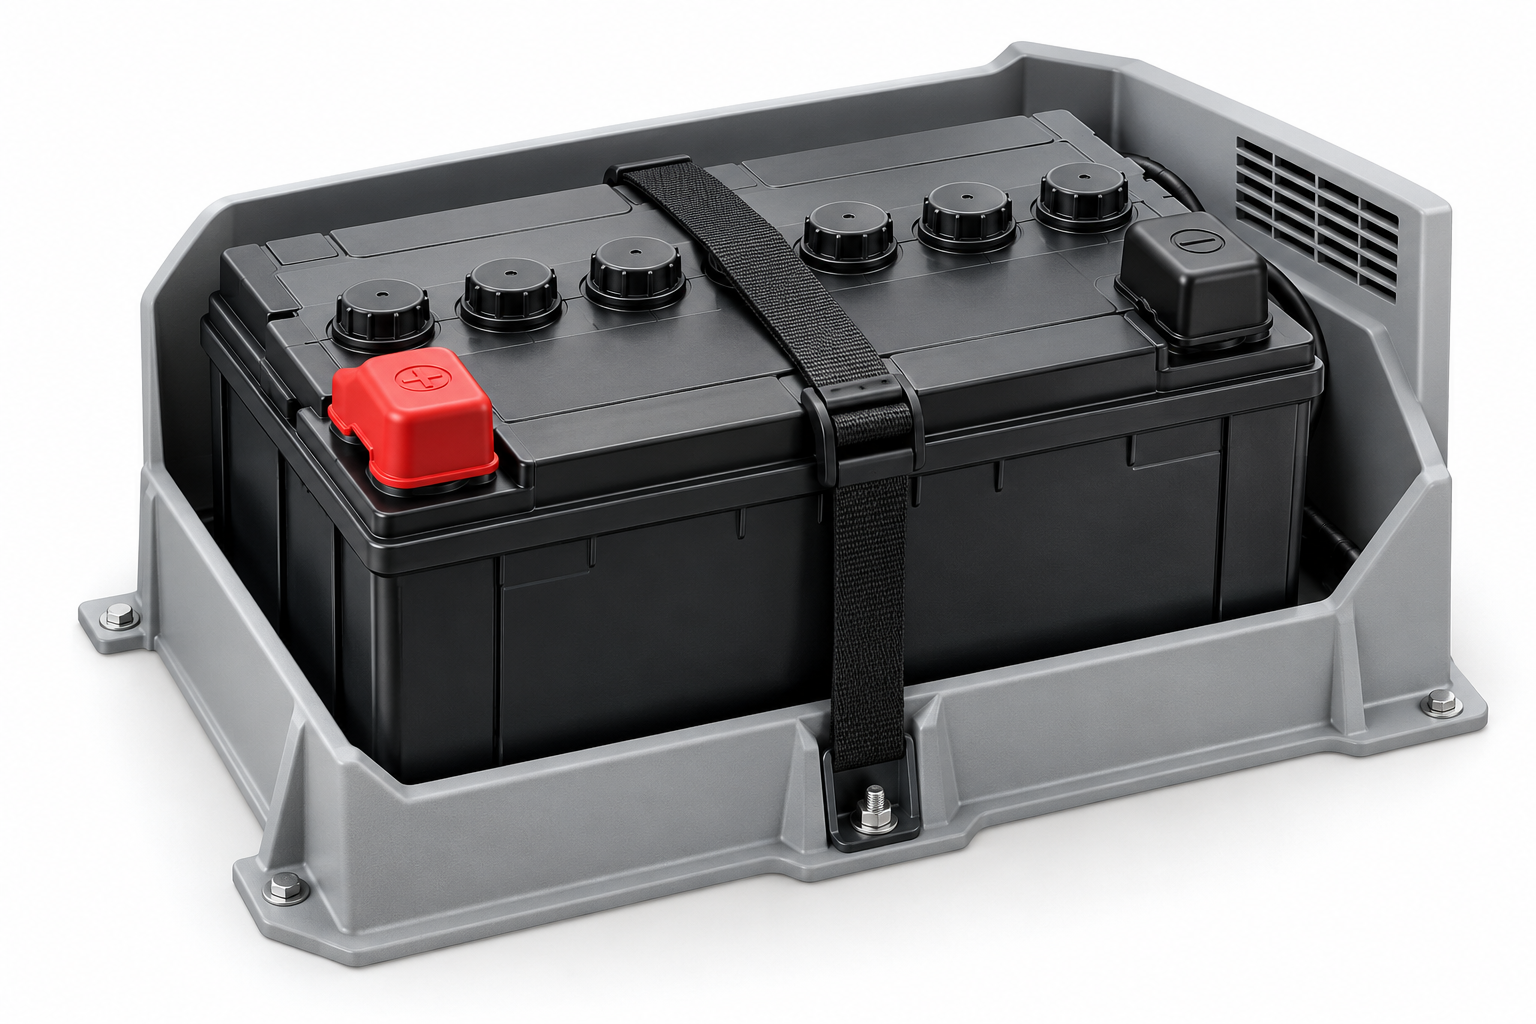
Owner inspection focuses on condition, secure mounting, terminals, cables and the specified compartment ventilation. Artwork is illustrative, not installation guidance.
Your battery inspection map
Expand a care point below. These panels work without scripts and keep the guidance available in a standard Custom HTML block.
1 · Terminal covers & connections
Look for damaged covers, corrosion, movement or discoloration. Keep positive terminals protected. Electrical connections require the correct hardware and specified torque; a cable that feels tight is not a torque measurement.
2 · Cable insulation & support
Inspect visible runs for chafing, pinching or heat damage. Cables should be supported so road vibration does not pull on terminals. Arrange service for damaged wiring; do not simply fit a larger fuse.
3 · Battery case & hold-down
The bank should be secured for travel without damaging the case. Look for cracks, swelling, leaks or a loose tray. Stop use and arrange service when the case is damaged or the battery is abnormally hot.
4 · Ventilation & compartment
Keep the manufacturer-required ventilation clear. Flooded batteries can release charging gas; AGM can vent under faults or overcharge. Lithium location and ventilation/cooling still must meet the installation instructions.
5 · Service caps: flooded batteries only
Only open serviceable flooded cells using the maker’s procedure. Use distilled water, never routine acid additions. Keep cleaning solutions out of cells. Do not open AGM, gel or sealed lithium cases.
6 · Temperature & BMS information
Check the actual battery’s charge and discharge temperature limits. Low-temperature cutoff and self-heating are separate features; verify both. An inhibited charge needs diagnosis, not a bypass of protection.
Connection & condition inspection
Check for swelling, leaks, corrosion, chafing, loose supports and heat discoloration. Stop using damaged or abnormally hot batteries and arrange service.
On a conventional negative-ground single-battery connection, disconnect negative first and reconnect it last. Complex banks need their specified procedure.
Tighten terminals to the exact torque with the correct hardware. Do not guess or open sealed cells.
Clean by the battery maker’s method. Keep lead-acid corrosion neutralizer out of cells and electronics; dry fully. Apply approved protection after the electrical joint is made.
Flooded batteries · water in the right order
Check regularly, especially with heavy use or heat. If plates are exposed, add only enough distilled water to cover them before charging. After full charge, top up to the specified level. Do not overfill. Keep caps and enclosure ventilation in service.
AGM, gel and lithium do not need watering.
Routine care checklist
Tap the boxes as you work. These temporary checks reset when the page reloads; save your service record in your maintenance log.
01
Before a trip
Review state of charge, visible condition, secure mounting and any monitor warnings. Confirm essential loads operate normally.
02
During regular use
Use the manufacturer’s inspection interval. Heavy cycling and hot weather can increase flooded-water service needs. Record findings and trends.
03
After a change
Recheck approved settings and have new electrical work verified before travel. Log changes to battery type, charger, cables, BMS or protection.
A dead battery, a tripped BMS and a poor connection can feel similar from inside the RV. Start with the information you can check safely.
01
Lead-acid / AGM storage
Store charged using the approved maintenance/storage profile and inspect periodically. A deeply discharged lead-acid battery freezes more readily. Recheck water in serviceable flooded cells as directed.
02
LiFePO4 storage
Use the model’s storage charge level, temperature limits and recharge interval. Around half charge is common guidance for some models, but it is not universal. Identify parasitic loads and what the disconnect actually isolates.
Battery goes flat quickly
Review actual loads, inverter standby draw, parasitic devices, charging performance and capacity. Compare measured energy with expectations. A bad connection or one failing battery can affect the whole bank.
Charger runs, but battery does not charge
Check normal disconnect positions, compatible settings and accessible indicators. A BMS may inhibit charging because of temperature, voltage or a fault. Use the exact recovery instructions; never bypass BMS protection.
Lights work, but inverter / jacks fail
High-current loads can reveal voltage drop, a current-limit trip, weak capacity or a connection problem. Record faults and voltage behavior if you can measure safely. Do not increase fuse ratings or repeatedly run stalled equipment.
Heat, swelling, acid leak or smoke
Stop use and keep people clear. Do not charge or attempt to repair a damaged battery. For smoke or fire, evacuate and call emergency services. Follow professional instructions before reconnecting or transporting the battery.
1
Record what happened
Note the appliance in use, temperature, charging source, displayed voltage/state of charge and exact alarm code.
2
Check normal controls
Review the documented disconnect positions and visible charger/BMS indicators. A powered AC outlet does not prove the house bank is charging.
3
Look for a pattern
Does the fault happen only with a heavy load, in cold weather or after days in storage? That context helps separate current, temperature, capacity and parasitic-load issues.
4
Use the approved recovery procedure
Follow the exact battery and charger manuals. Do not bypass a BMS, oversize a fuse or repeatedly restart a failing load. Arrange service when the cause is uncertain.
Good records make maintenance easier and give a technician useful evidence when something changes.
Record: chemistry, model, quantity, voltage, Ah/Wh, installation date, BMS limits, charger/controller models and settings, temperature limits, service, water added where applicable, faults and next inspection.
Use your exact RV and component model manuals for specifications, products, procedures and service intervals. This pod explains principles; it is not a substitute for the installation or service manual.
Reference review: October 25, 2026. Product formulations and manuals may change.
01
Battery identity
Chemistry, brand/model, installation date, quantity, bank voltage, nominal Ah/Wh and series/parallel layout.
02
Operating limits
Charge/discharge current limits, temperature limits, BMS details, approved charge settings and terminal torque from the manual.
03
Service history
Date, symptoms, monitor readings, water added where applicable, work performed, settings changed and next inspection.
Additional technical references:Victron lithium operation and monitoring. Chemistry efficiency and price sources are linked in their lessons. Review date: October 25, 2026. Product-specific manuals control final settings and procedures.